Outlook / Microsoft 365 Application Configuration
Application Registration
Follow the instructions in Register an application with the Microsoft identity platform to create a new application. An Azure account with an active subscription is required for this purpose. The basic steps are outlined below:
Login to https://portal.azure.com/#home by using your active account;
Navigate to Microsoft Entra ID.
On the Overview page, locate the Tenant ID.
This value uniquely identifies your organization’s directory in Microsoft Entra ID and is required for OAuth2 token requests.Navigate to App registrations and select New registration.
Enter a meaningful Name for your application. This name is visible to users and can be changed at any time. Multiple app registrations can share the same name.
Under Supported account types, specify who can use the application, then click Register.
After registration, locate the new application in the App registrations list and note the Application ID. Save this value, as it is required for OAuth2 token requests.
Select the newly created application and navigate to Manage > Certificates & secrets in the left panel.
Under the Client secrets tab, select New client secret. Make sure to copy and save the secret value immediately after creation, as it will not be shown again. This value is required for OAuth2 token requests.
Add API permissions
Once the application is registered, you can grant the application the required access rights to send email via Outlook SMTP:
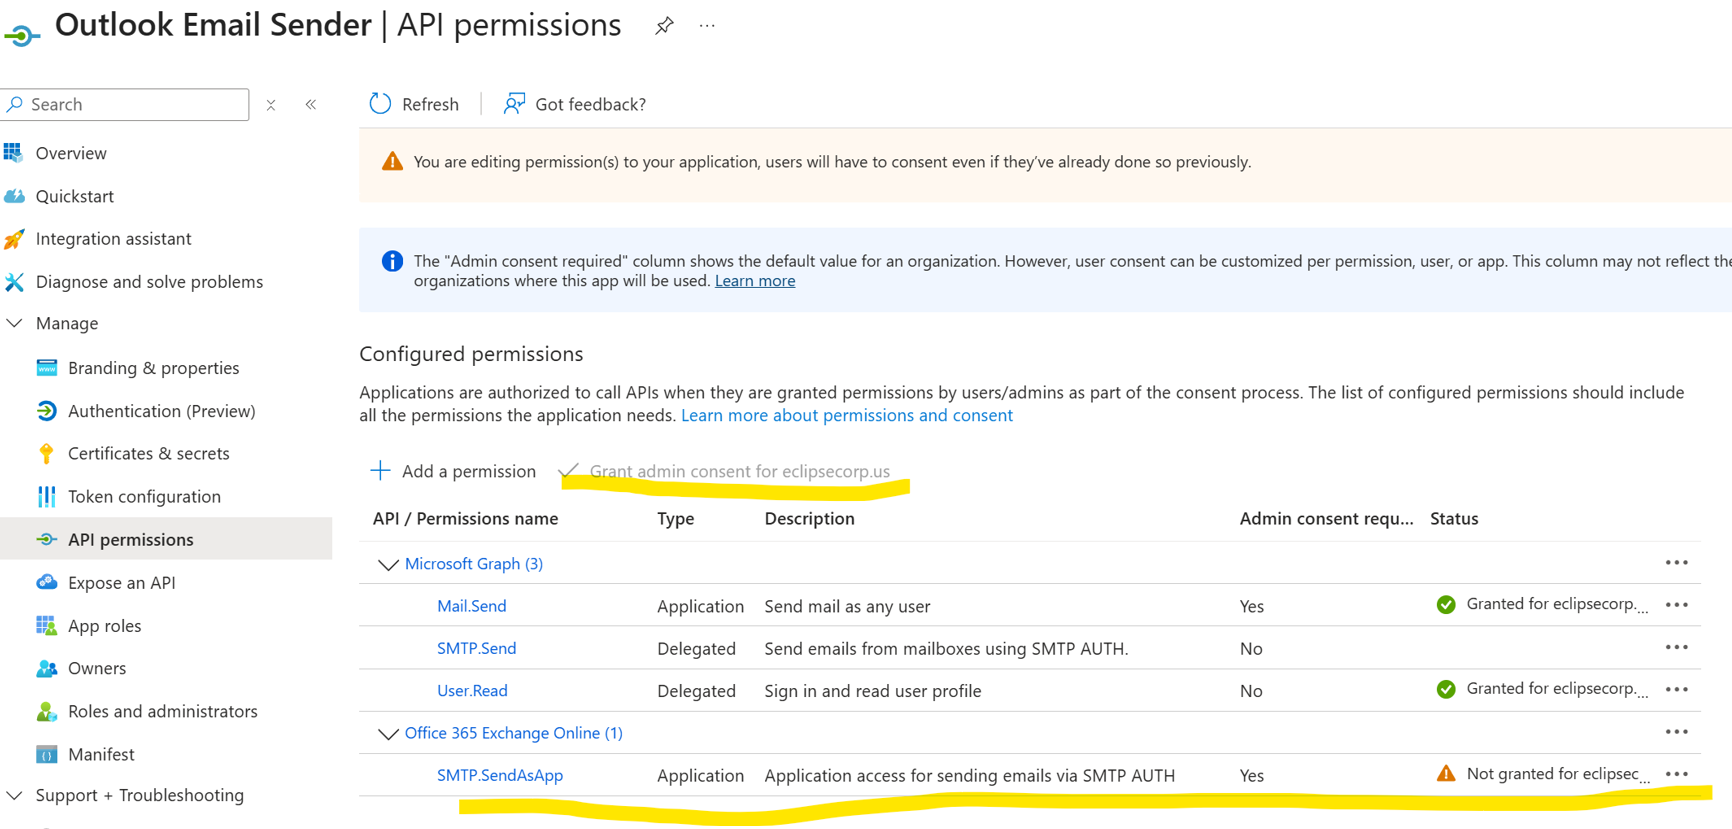
From the app's overview page, go to API Permissions > Add a Permission > APIs my organization uses > Office 365 Exchange Online > Application Permissions.
Use the search bar to search for Office 365 Exchange Online.
Click Application Permissions, select SMTP and tick check box SMTP.SendAsApp
Click Add Permissions to grant the necessary permissions.
On the API Permissions page click “Grant admin consent”
Register service principals in Exchange
Once a tenant admin consents your Microsoft Entra application, they must register your Entra application's service principal in Exchange via Exchange Online PowerShell (Authenticate an IMAP, POP or SMTP connection using OAuth ):
Install-Module -Name ExchangeOnlineManagement
Import-module ExchangeOnlineManagement
Connect-ExchangeOnline -Organization <tenantId>
Registration of an Microsoft Entra application's service principal in Exchange is shown in the following example:
New-ServicePrincipal -AppId <APPLICATION_ID> -ObjectId <OBJECT_ID> [-Organization <ORGANIZATION_ID>]
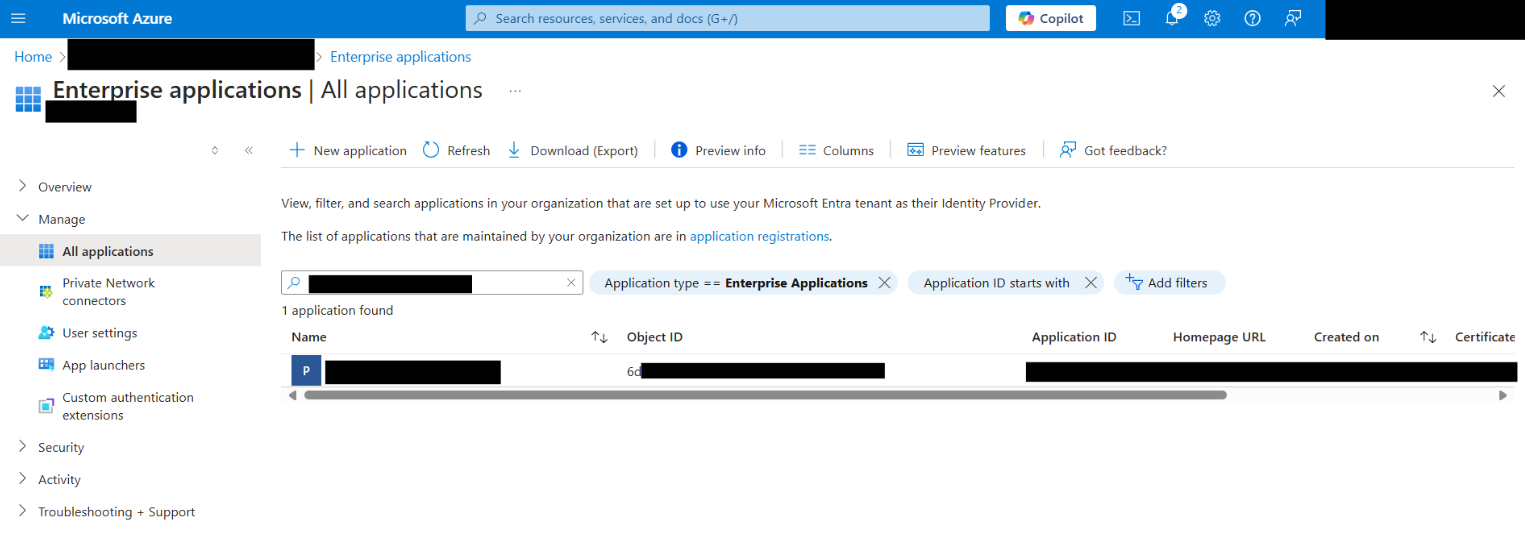
The OBJECT_ID is the Object ID from the Overview page of the Enterprise Application node (Azure Portal) for the application registration. It is not the Object ID from the Overview page of the App Registrations node. Using the incorrect Object ID will cause an authentication failure.
The following screenshot shows an example that finds the correct Object ID, which begins with '6d':
You can get your registered service principal's identifier <SERVICE_PRINCIPAL_ID> using
Get-ServicePrincipal | fl
The <SERVICE_PRINCIPAL_ID> value is the same as the <OBJECT_ID> from the previous step and should be listed in the registered service principals.
The tenant admin can now add the specific mailboxes in the tenant that will be allowed to be accessed by your application. The following example shows how to give your application's service principal access to one mailbox:
Add-MailboxPermission -Identity "john.smith@contoso.com" -User <SERVICE_PRINCIPAL_ID> -AccessRights FullAccess